You should unit test component templates
There is a common misconception among frontend developers that you should not unit test the template of a component. This is incorrect. Not only can you test your components’ templates, but you should.
Reason #1: It’s officially recommended
The official Angular documentation says (emphasis mine):
A component is more than just its class. A component interacts with the DOM and with other components. The class-only tests can tell you about class behavior. They cannot tell you if the component is going to render properly, respond to user input and gestures, or integrate with its parent and child components…
A component, unlike all other parts of an Angular application, combines an HTML template and a TypeScript class. The component truly is the template and the class working together. To adequately test a component, you should test that they work together as intended.
The docs writers are arguing components, unlike other parts of an Angular application, are code and markup, so both should be tested.
Reason #2: Tests should mimic real users
The whole reason to write automated tests is to give yourself confidence when shipping code. If you merge in a new feature and all the automated tests pass, you can be more confident your change has not caused a regression somewhere. You can’t be 100% confident, because no test suite is perfect, but good tests lower the odds of regressions.
What kind of test should make you feel more confident? I would argue it is a test which mimics real user behavior as closely as possible.
Now, consider this: no user ever calls a method on your component’s class. If your component looks like this…
@Component({
  selector: 'app-submit-button',
  template: '<button (click)="onSubmit()">Submit</button>'
})
export class SubmitButtonComponent {
  onSubmit() {
    console.log('submitted');
  }
}
…the user will never call onSubmit(). They will click the button element, and that will activate your component’s class functionality.
If we wanted to test this component and mimic real user behavior, we should not directly call onSubmit() in our tests. We should simulate a click event on the <button> and then see if our component console logs. That way, we are testing whether the template and class work together as intended, just like the Angular documentation recommends.
Testing like this helps catch when the template and class are out of sync. For example, imagine we were in a rush and accidentally wrote:
@Component({
  selector: 'app-submit-button',
  template: '<button>Submit</button>' // Forgot the click listener
})
export class SubmitButtonComponent {
  onSubmit() {
    console.log('submitted');
  }
}
This component is broken. Clicking the button in it doesn’t do anything. However, this mistake would not be caught by a unit test that directly called onSubmit(). By simulating a click on the <button> in our test instead, we mimic real user behavior and catch the error. For more, see Kent C. Dodds’ great post on shallow rendering.
The more your tests resemble the way your software is used, the more confidence they can give you.
Reason #3: Test your component’s public API (the template)
It is generally a good idea to test modules of code through their public API.
For example, imagine you are writing accounting software and need a function called isInvoiceInvalid(). This function accepts one argument, invoice, and returns a boolean. The “public API” of this function is to just call it and see what it returns. We should test it through its public API by calling it with lots of different invoices and seeing if it correctly identifies which ones are invalid.
isInvoiceInvalid() may be using many private methods to judge whether an invoice is invalid, but you, the person writing the test, do not need to know what those methods are. You are simply testing the function through its public API and seeing if it returns the right result. If another developer comes along and rewrites isInvoiceInvalid(), your tests should keep running, because they don’t care about the implementation of the function. They just care that it works.
For Angular components, the template is the “public API” our users will use. They will tap, click and type into our templates to cause changes in our application. Testing through the template gives us some distance between our tests and the actual implementation of our component. Hopefully we can change the implementation of our component class without breaking our tests.
For example, here is a sample Angular project (StackBlitz) with a basic signup form. The user can type in a username and password. As they type in the password field, they see up to three colored boxes rating the strength of their chosen password. For a password that meets all the requirements, they will see three green boxes.
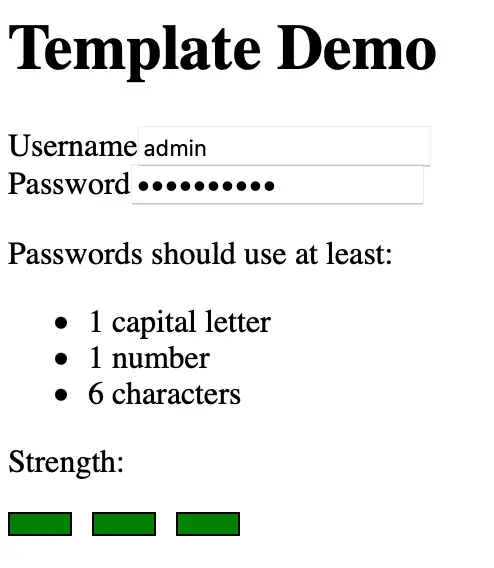
The green boxes are a presenter component that accepts the user’s password strength as an input and renders it as up to three colored boxes.
import { Component, Input } from '@angular/core';
import { PasswordStrength } from '../models/password-strength.type';

@Component({
  selector: 'app-password-strength-indicator',
  templateUrl: './password-strength-indicator.component.html',
  styleUrls: ['./password-strength-indicator.component.css']
})
export class PasswordStrengthIndicatorComponent {
  @Input() passwordStrength: PasswordStrength | null = null;

  get strengthColorCssClass(): string {
    switch (this.passwordStrength) {
      case 0:
        return 'red';
      case 1:
        return 'red';
      case 2:
        return 'yellow';
      case 3:
        return 'green';
      default:
        return '';
    }
  }

  // Please excuse this hacky ngFor workaround
  get arrayForNgFor(): number[] {
    let numberOfBoxes = this.passwordStrength ?? 0;
    return new Array(numberOfBoxes).fill(0);
  }
}<div class="container">
<div
*ngFor="let i of arrayForNgFor"
[ngClass]="strengthColorCssClass"
class="strength-box"
></div>
</div>.container {
display: flex;
justify-content: start;
}
.strength-box {
width: 30px;
height: 10px;
border: 1px solid black;
margin-right: 10px;
}
.red {
background-color: red;
}
.yellow {
background-color: yellow;
}
.green {
background-color: green;
}PasswordStrengthIndicatorComponent is almost akin to a pure function. It accepts one input, passwordStrength, and displays that many boxes to the user in the template.
The “public API” of this component is its template. It’s the number and color of the boxes displayed to the user. We must test the template to see if it works.
How to test Angular components through the template
PasswordStrengthIndicatorComponent is a useful example to demonstrate how to unit test a component through its template. We want to see if it will render one box for each point of the user’s password strength. To test that, we should start with the test file created when we ran ng generate component:
import { ComponentFixture, TestBed } from '@angular/core/testing';
import { PasswordStrengthIndicatorComponent } from './password-strength-indicator.component';
import { By } from '@angular/platform-browser';

describe('PasswordStrengthIndicatorComponent', () => {
  let component: PasswordStrengthIndicatorComponent;
  let fixture: ComponentFixture<PasswordStrengthIndicatorComponent>;

  beforeEach(async () => {
    await TestBed.configureTestingModule({
      declarations: [PasswordStrengthIndicatorComponent]
    }).compileComponents();
  });

  beforeEach(() => {
    fixture = TestBed.createComponent(PasswordStrengthIndicatorComponent);
    component = fixture.componentInstance;
    fixture.detectChanges();
  });
});
This code creates a virtual DOM and mounts PasswordStrengthIndicatorComponent within it.
Some Angular developers are strongly anti-TestBed, on the grounds that it is clunky and slow. I sympathize with this view. It is undeniably painful to do dependency injection with TestBed. However, it is still the best way to test all of your component, template included. It is also much faster in Angular 9+.
Second, let’s write two helper functions we can use across our tests:
// ...
beforeEach(() => {
  fixture = TestBed.createComponent(PasswordStrengthIndicatorComponent);
  component = fixture.componentInstance;
  fixture.detectChanges();
});

function numberOfStrengthBoxes(): number {
  return fixture.debugElement.queryAll(By.css('div.strength-box')).length;
}

function strengthBoxIsColored(color: string): boolean {
  const strengthBox = fixture.debugElement.query(By.css('div.strength-box'))
    .nativeElement as HTMLDivElement;
  return strengthBox.classList.contains(color);
}
// ...
These two functions analyze the template of our test environment to check our “public API” is returning the correct results. We should try to avoid tying our tests too closely to the specific HTML layout of our component, so let’s just count the number of boxes and their color.
Last, let’s test the component behaves as expected:
// ...
function strengthBoxIsColored(color: string): boolean {
  const strengthBox = fixture.debugElement.query(By.css('div.strength-box'))
    .nativeElement as HTMLDivElement;
  return strengthBox.classList.contains(color);
}

it('should render one strength box for each point of password strength', () => {
  component.passwordStrength = 2;
  fixture.detectChanges();
  expect(numberOfStrengthBoxes()).toBe(2);
});

it('should color the strength boxes red if password strength is 1', () => {
  component.passwordStrength = 1;
  fixture.detectChanges();
  expect(strengthBoxIsColored('red')).toBeTrue();
});

it('should color the strength boxes yellow if password strength is 2', () => {
  component.passwordStrength = 2;
  fixture.detectChanges();
  expect(strengthBoxIsColored('yellow')).toBeTrue();
});

it('should color the strength boxes green if password strength is 3', () => {
  component.passwordStrength = 3;
  fixture.detectChanges();
  expect(strengthBoxIsColored('green')).toBeTrue();
});
// ...
See? Not so bad.
This test could have gone further and even used snapshot testing to verify that the green CSS class actually made the box green, but snapshot tests tend to be brittle. Again, we don’t want to tie our tests too tightly to the current implementation of the component. Checking for the right CSS class should be enough.
Conclusion
Components are the combination of logic and markup. To make sure they work for your users, you should test both of them, and that they work together correctly.